

Formulas, heel on the pedal, advice from a friend: there are many ways to set your saddle. Only one looks at what really matters, namely your leg while you are pedalling : the knee angle method. Here is how to apply it, step by step.
In short
- The hip-knee-ankle angle is measured when the crank is at the bottom (bottom dead centre).
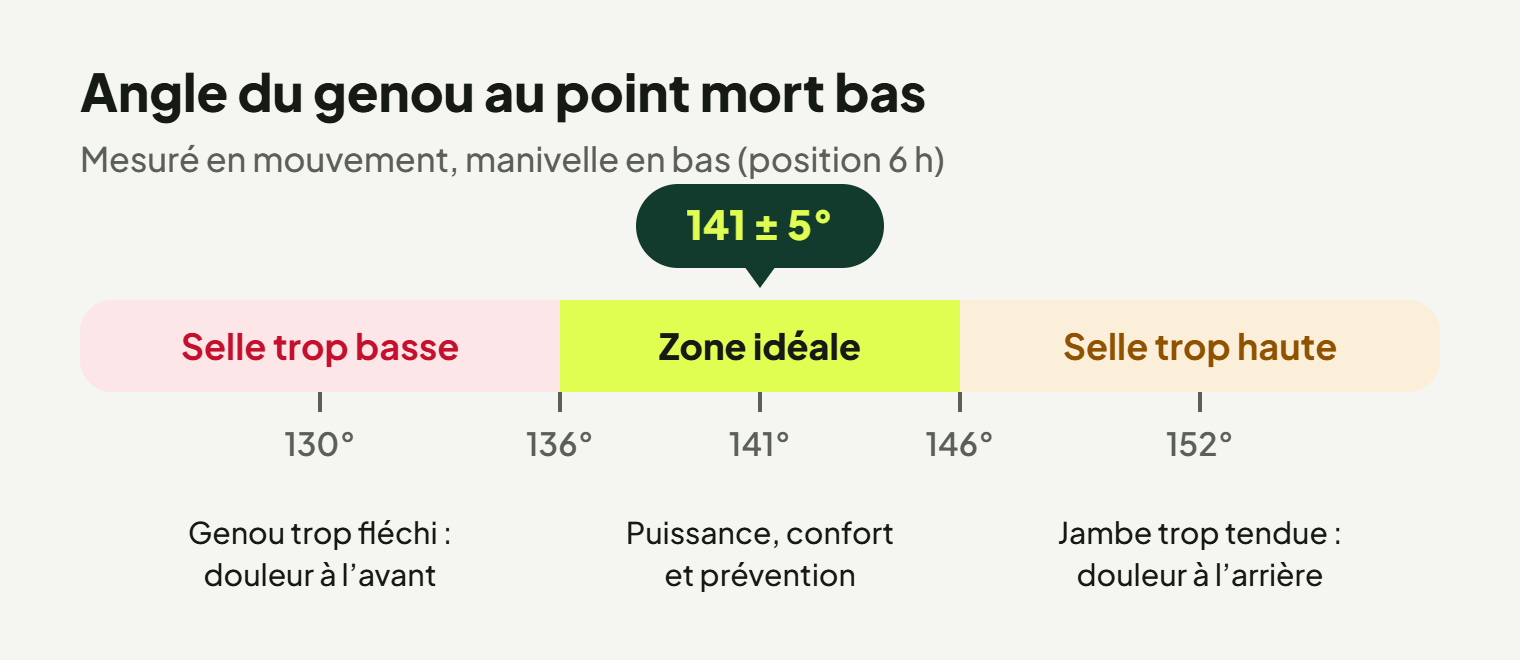
- Target range: 141 ± 5°, i.e. from 136 to 146°.
- Below it, the saddle is too low; above it, too high.
- Correct in small steps of a few millimetres, then measure again.
Contents
Why measure an angle rather than a height
A saddle height in centimetres says nothing about your comfort. Two cyclists of the same height may need different settings: thigh and shin length, sole thickness, cleat stack height, crank length, how you place your foot, flexibility.
The knee angle, on the other hand, is the end result of all these variables. If the angle is right, the height is right, however you got there. That is why posture analyses rely on it.
The measurement must be taken in motion. With your leg resting while stationary, you don’t sit as you do when riding: the ankle and pelvis position themselves differently. Ferrer-Roca et al. (2012, Journal of Strength and Conditioning Research) showed that static settings do not guarantee the right knee flexion once you are moving.
The benchmark: 141 ± 5°
| Angle at bottom dead centre | Reading | What to do |
|---|---|---|
| Less than 136° | Saddle too low | Raise the saddle |
| 136 to 146° | Ideal range | Change nothing |
| More than 146° | Saddle too high | Lower the saddle |
These values refer to the maximum angle of the knee, i.e. the leg at its most extended, at the bottom of the pedal stroke. The further you are from the ideal range, the bigger the correction.
Measuring your angle, step by step
- Set the bike up on a home trainer or, failing that, facing a wall so you can hold on.
- Keep your usual kit : shorts, shoes and pedals you ride with. A different sole changes the measurement.
- Film side-on, from the drivetrain side, whole body in the frame, phone at hip height and perfectly straight.
- Pedal at your usual pace for 5 to 10 revolutions, after a few minutes’ warm-up.
- Send the video to Posturise : the AI locates your joints and measures your knee angle over the central 10 seconds.
All the details for a successful video are in our guide Home trainer or wall: filming yourself for your analysis.
Correcting the height without getting it wrong
- Mark the current position of the seatpost with a piece of tape before loosening anything.
- Move in small steps : 3 to 5 mm at a time. A big angle difference can’t be corrected in one go.
- Only change the height. If you also move the saddle back or forward, the angle changes and you won’t know what made the difference.
- Respect the tightening torque shown on the clamp, especially with a carbon seatpost or frame.
- Measure again : with Posturise, you can do several sessions in a row and compare them.
Give your body time
After a correction, ride for 2 to 3 weeks before judging. A good position can feel strange at first if you have ridden differently for a long time.
Measurement pitfalls
Pedalling too slowly or too fast
A very low cadence or a sprint changes how you place your foot. Pedal as you would on a ride, at a steady, easy pace.
An ankle that compensates
Some cyclists “point” their toes down to reach the pedal. The knee angle looks correct, but the saddle is actually too high. The Posturise result also includes foot position: look at the two together.
Measuring after an equipment change… without saying so
New shoes, new cleats, new saddle: each change moves the foot or pelvis by a few millimetres. Measure again after every equipment change.
What next?
Saddle height is the first adjustment, not the only one. Once your knee angle is in the ideal range, look at handlebar reach (arm opening, 90 ± 5°) then handlebar height (back inclination, 45 ± 5°). To learn more about the other methods (0.883 formula, heel method), read our complete saddle height guide.
Frequently asked questions
Why 141° and not 145 or 135?
The 136 to 146° range is a compromise between pedalling efficiency and joint comfort. There is no single angle that suits everyone: the aim is to get within the range, not to hit an exact figure.
Can I measure the angle with a protractor?
Yes, with a goniometer and a stationary bike, but the measurement is static and depends a lot on how you position your leg. A video measurement, while pedalling, better reflects your real position.
Should I measure both legs?
The video is taken from one side only, the drivetrain side. If you feel discomfort on one side only, mention it to a health professional: a leg length difference can’t be corrected with saddle height alone.
My angle is right but my knee still hurts. What should I do?
Height is not the only possible cause: saddle setback, cleats and training volume also play a part. Our article Knee pain when cycling: matching the discomfort to the right adjustment helps you sort it out. If the pain persists, see a doctor.